Arguably the most important change in Leopard was not a user feature, but a developer one: Core Animation. Over the coming years, the way applications look and react to user interaction will change dramatically, and that will be largely due to the ease with which interfaces can be animated with Core Animation. Sure, there will also be overt eye candy, but there will also be lots of more subtle changes to application interfaces that truly benefit the user, giving useful feedback.
Core Animation is obviously an enormous boon for user interface developers, but it has other uses too, such as visualization. There are many scientific applications for which Core Animation could be very useful. In the next few tutorials, I want to introduce Core Animation, and show its potential for scientific visualization. I won’t be showing you how to create the CoverFlow effect, or reprogram the Front Row application, but will hopefully introduce you to a whole new way of looking at Core Animation.
Table of Contents
What is Core Animation?
It is easy to get confused about what exactly Core Animation is, because it is an umbrella for several different types of functionality. And what makes it more confusing is that developers can use it implicitly with Cocoa NSView objects to animate their UIs. These views are called layer-backed views, and strictly speaking are not part of Core Animation itself, but do make use of it.
In addition to programming in Cocoa with layer-backed views, you can also program directly with Core Animation classes. Core Animation combines a number of different aspects. First there is animation: Core Animation can animate a property (e.g. position, opacity, orientation) in time. It performs this animation on a dedicated thread, so the animation goes on even if the hardware can’t keep up — Core Animation will simply drop frames to make sure that the animation finishes on time.
The second important aspect of Core Animation is layering. (While still in the pre-release phase, Core Animation was even called ‘Layer Kit’, and Core Animation classes had an ‘LK’ prefix.) Layers are a bit like Cocoa views, but they exist in three-dimensional space. They are rectangular, and can hold assorted content, such as OpenGL renderings, QuickTime movies, images, and text. Each layer can hold different content, and can be superimposed, meaning you can effectively combine different types of content in a single view. For example, you could place some controls on top of a playing QuickTime movie, or have an 2D image appear next to an OpenGL rendering.
So Core Animation is not simply animation, but layers and animation. And the two work beautifully in harmony. For example, set the position of a layer and it animates to the new position, all the while presenting its content. A QuickTime movie will continue to play, and an OpenGL view continue to animate (if it is an animated rendering).
What is it not?
The 3D nature of Core Animation can also be a bit confusing. Don’t we already have that? Isn’t it called OpenGL?
Core Animation is not a 3D engine, and in that sense it should probably be called 2.5D. Layers do have a position along the Z axis, which comes out of the screen, but if two layers intersect, Core Animation will not do the math to make sure things look ‘right’. Better not to let layers intersect.
Another thing to remember is that layers are not polygons. In OpenGL, it is easy to build up an arbitrary surface out of polygonal pieces, but layers are rectangular, and cannot represent arbitrary surfaces. Layers provide a 2D canvas that moves in a 3D space, and are not appropriate for representing true 3D objects. For that you need OpenGL.
The Fleas on the Fleas
To introduce you to Core Animation, I’m going to develop a simple application called ‘Flea on Flea’. When complete, this app will have lots of Core Animation layers — the fleas — moving around on parent layers — the other fleas — in a recursively animated collage.
Sound enticing? Well, you will have to wait, because this week we are only going to get up to animating a simple square on a black background. Although this might not sound too exciting, at the end of the tutorial, you will already have seen many of the most important aspects of Core Animation programming.
Before embarking on the tutorial proper, I suggest you download the finished app, and see how it works. There is no interaction in the application — it is simply an animated scene. If you want to follow along, download the source code too.
The Layer Hosting View
The first thing you need to do before you can start generating and animating layers is to provide a container for them in the user interface. This is just an ordinary NSView that has a special backing layer, and is known as the hosting view. You can see how such a hosting view can be configured in the setupHostView method of the Flea on Flea controller class FFController.
-(void)setupHostView {
    CALayer *layer = [CALayer layer];
    CGColorSpaceRef colorSpace = CGColorSpaceCreateWithName(kCGColorSpaceGenericRGB);
    CGFloat components[4] = {0.0f, 0.0f, 0.0f, 1.0f};
    CGColorRef blackColor = CGColorCreate(colorSpace, components);
    layer.backgroundColor = blackColor;
    [hostView setLayer:layer];
    [hostView setWantsLayer:YES];
    CGColorRelease(blackColor);
    CGColorSpaceRelease(colorSpace);
}
A layer in Core Animation is represented by the CALayer class. To use the Core Animation classes, you need to add the QuartzCore framework to your project, and import the QuartzCore.h header.
#import <QuartzCore/QuartzCore.h>
You can use a vanilla CALayer instance as the backing layer, as shown above, but there are also several different subclasses of CALayer, which could be useful if you need to render something more substantial in your hosting view. For example, if you want to have some OpenGL content in the hosting view, back it with a CAOpenGLLayer. (Note that just because you use a CAOpenGLLayer, does not mean your view has to be an NSOpenGLView. In general, you should just use a plain NSView object, and it should not do any drawing of its own.)
Setting the backing layer of the hosting view is simple: you just use the setLayer: method, and make sure that you call setWantsLayer: passing in the argument YES.
    [hostView setLayer:layer];
    [hostView setWantsLayer:YES];
That’s often all there is to creating a backing layer, but in Flea on Flea we want to set the background color to black. To do that, we create a CGColor and set the backgroundColor property of the layer.
    CGColorSpaceRef colorSpace = CGColorSpaceCreateWithName(kCGColorSpaceGenericRGB);
    CGFloat components[4] = {0.0f, 0.0f, 0.0f, 1.0f};
    CGColorRef blackColor = CGColorCreate(colorSpace, components);
    layer.backgroundColor = blackColor;
    ...
    CGColorRelease(blackColor);
    CGColorSpaceRelease(colorSpace);
The QuartzCore framework is quite low level, so you usually have to work with Core Graphics types and primitives, rather than Cocoa objects. For example, in the code above, a CGColor is created, rather than an NSColor. This can be a bit ungainly, because you have to worry about memory management and old-fashioned stuff like that, but you soon get used to it. Just remember that when you create a Core Graphics type, make sure you release it when you are finished with it.
Adding Sublayers
With a hosting view in place, we can now add sublayers that move around in the host. Flea on Flea uses the createFleaLayerInLayer: method for this, which is called once from awakeFromNib.
-(void)awakeFromNib {
    [self setupHostView];
    [self createFleaLayerInLayer:hostView.layer];
    ...
}
createFleaLayerInLayer: adds a sublayer to the layer passed in, which in this case is the host view backing layer.
-(void)createFleaLayerInLayer:(CALayer *)parentLayer {
    CGColorSpaceRef colorSpace = CGColorSpaceCreateWithName(kCGColorSpaceGenericRGB);
    CALayer *layer = [CALayer layer];
    CGRect frame = parentLayer.bounds;
    frame.origin.x += 20.0f;
    frame.size.width = parentLayer.bounds.size.width / 10.0f;
    frame.size.height = frame.size.width;
    layer.frame = frame;
    CGFloat components[4] = {1.0f, 1.0f, 1.0f, 1.0f};
    CGColorRef whiteColor = CGColorCreate(colorSpace, components);
    layer.backgroundColor = whiteColor;
    [parentLayer addSublayer:layer];
    CGColorRelease(whiteColor);
    CGColorSpaceRelease(colorSpace);
}
The new layer is created in the same way as the backing layer was, and the background color set to white. A layer has similar geometric properties to an NSView, such as a frame, which gives the size and position of the layer in its parent’s coordinate system, and bounds, which delineate positions in the layers own coordinates. In createFleaLayerInLayer:, the bounds of the parent layer are used to size the new sublayer. The new layer is made a tenth the size of the width of the parent layer, and positioned to the right of the parent layer’s origin (in the lower-left corner).
    CGRect frame = parentLayer.bounds;
    frame.origin.x += 20.0f;
    frame.size.width = parentLayer.bounds.size.width / 10.0f;
    frame.size.height = frame.size.width;
    layer.frame = frame;
The addSublayer: method adds the new layer to the parent.
[parentLayer addSublayer:layer];
If you run Flea on Flea with only this code in place, it will draw a white square on a black background, but nothing will change. In the next section, we will see how to animate the square.
Animating Layers
In the very simple Flea on Flea example, the white sublayer will be made to move to random locations, as well as scale and rotate. There will be no user interaction, but the layer could easily be made to respond to mouse clicks or some other interaction.
In the awakeFromNib method, a timer is started to repeatedly invoke the changeDestination method every 2 seconds.
-(void)awakeFromNib {
    ...
    [NSTimer scheduledTimerWithTimeInterval:2.0 target:self selector:@selector(changeDestination)
         userInfo:nil repeats:YES];
}
The changeDestination method chooses random values for the position of the sublayer, and its orientation, and starts an animation to move the layer toward those destination values.
-(void)changeDestination {
    [CATransaction begin];
    [CATransaction setValue:[NSNumber numberWithFloat:3.0f] forKey:kCATransactionAnimationDuration];
    CALayer *layer = hostView.layer.sublayers.lastObject;
    layer.position = CGPointMake(hostView.bounds.size.width * rand()/(CGFloat)RAND_MAX,
        hostView.bounds.size.height * rand()/(CGFloat)RAND_MAX);
    CGFloat factor = rand()/(CGFloat)RAND_MAX * 2.0f;
    CATransform3D transform = CATransform3DMakeScale(factor, factor, 1.0f);
    transform = CATransform3DRotate(transform, acos(-1.0f)*rand()/(CGFloat)RAND_MAX,
        rand()/(CGFloat)RAND_MAX, rand()/(CGFloat)RAND_MAX, rand()/(CGFloat)RAND_MAX);
    layer.transform = transform;
    [CATransaction commit];
}
When you change properties of CALayer objects, the layer will automatically animate to the new values. So if you entered this in a program
layer.position = CGPointMake(50.0, 50.0);
the layer would fly to the new position. This is known as implicit animation. But what we have above in changeDestination is an example of explicit animation. When you use explicit animation, you use a CATransaction to group together a series of property changes, and set properties of the animation. A transaction begins with a call to the begin class method
[CATransaction begin];
and ends when the commit method is invoked.
[CATransaction commit];
In between you can set properties for the layers involved. The changeDestination method sets the position of the layer, and its transform property.
    CALayer *layer = hostView.layer.sublayers.lastObject;
    layer.position = CGPointMake(hostView.bounds.size.width * rand()/(CGFloat)RAND_MAX,
        hostView.bounds.size.height * rand()/(CGFloat)RAND_MAX);
    ...
    layer.transform = transform;
The transform has the CATransform3D type, and involves a random scaling of the layer, and a random rotation.
    CGFloat factor = rand()/(CGFloat)RAND_MAX * 2.0f;
    CATransform3D transform = CATransform3DMakeScale(factor, factor, 1.0f);
    transform = CATransform3DRotate(transform, acos(-1.0f)*rand()/(CGFloat)RAND_MAX,
        rand()/(CGFloat)RAND_MAX, rand()/(CGFloat)RAND_MAX, rand()/(CGFloat)RAND_MAX);
The CATransform3DMakeScale function creates a transform that has scaling factor arguments for x, y, and z. The CATransform3DRotate function applies a rotation to the transform passed in as first argument; the rotation is through an angle (in radians) passed as the second argument, around a vector (x, y, z) passed as the last three arguments.
The duration of the animation will be 0.25 seconds by default, but this can be changed by setting a value of the CATransaction class
[CATransaction setValue:[NSNumber numberWithFloat:3.0f] forKey:kCATransactionAnimationDuration];
Note that the animation has been set to take 3.0 seconds, but the timer that changes the destination fires every 2.0 seconds. In other words, the animation will not be able to complete before the timer starts a new animation. Can Core Animation cope with this? No problem.
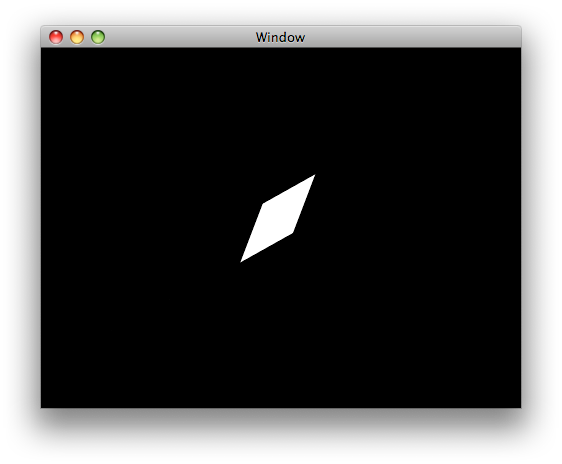
Running Flea on Flea
If you downloaded the Flea on Flea Xcode project, build and run it. You should see a white square dancing across the screen, rotating and scaling as it goes. Note how it moves for 2 seconds, then changes direction. Core Animation interrupts any existing animations, and smoothly modifies the motion of the square to accommodate the new destination. Try changing the duration of the animation and the timer in the source code, to see what effect it has on the way the square moves.
Further Reading
Next time we will make Flea on Flea live up to its name, by adding layers, on layers, on… Until then, you can read more about Core Animation in the Core Animation Programming Guide, and in a new book by Bill Dudney which is still in beta at The Pragmatic Programmers.
Stay connected